Master the Art of Performing a Complete Pedicure At Home! Eliminate the risk of bacterial or fungal infections and save money in the process.
Master the Art of Performing a Complete Pedicure At Home!
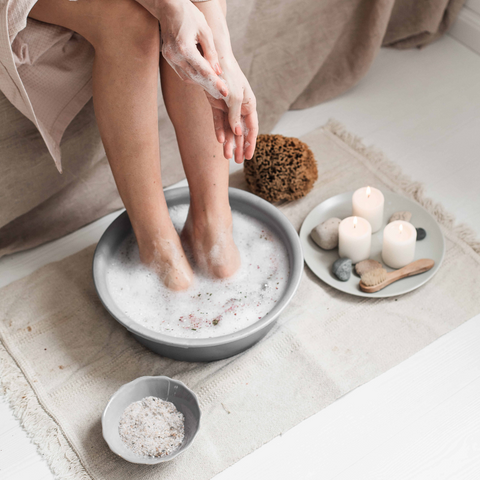
Step 1: Start with RELAX, an Epsom salt lemongrass soak designed to detoxify and purify the skin while softening the nails. Fill a basin with warm water and add a tablespoon of RELAX. Soak your feet for about 10-15 minutes to help relax your muscles and soften the nails. Prepare to be amazed with your results from Master the Art of Performing a Complete Pedicure At Home!
Step 2: Once your feet are soaked, carefully trim your nails using the nail nippers provided in the KIT. Trim them by following the natural curvature of the nail. Avoid cutting them too short. Take your time and ensure precision. If you need help, watch my tutorial on our YouTube channel (Lexington Podiatry).
Step 3: Next, use the nail rasp included in the KIT to gently smooth any rough edges of your nails. Additionally, you can use the nail rasp to carefully dig out any ingrown toenails, ensuring comfort and preventing further issues.
Step 4: Using the curette tool in the KIT, gently remove any debris that may have accumulated in the edges of your nails. This tool is ideal for removing fungal debris buildup, ensuring comfort.
Step 5: After cleaning the nails, it's time to focus on the skin. Use the soft tissue nippers or “cuticle clippers” in the KIT to remove excess skin around the nails. Remember not to push back the cuticles as they act as a sterile barrier, protecting you from fungal and bacterial infections.
Step 6: Once you've completed the previous steps, pat your feet dry with a clean towel. We recommend applying REPAIR to the nails. This 4-in-1 oil helps in treating any unsightly nails and prevention of nail fungus. It also hydrates peeling and cracked skin while thinning thicker nails and strengthening weaker ones.
Step 7: After applying REPAIR, we recommend apply the HEAL ointment stick. This urea-based ointment stick is designed to treat dry skin and calluses, as well as offering antifungal properties. Apply it to especially dry areas or calluses, gently massaging it in.
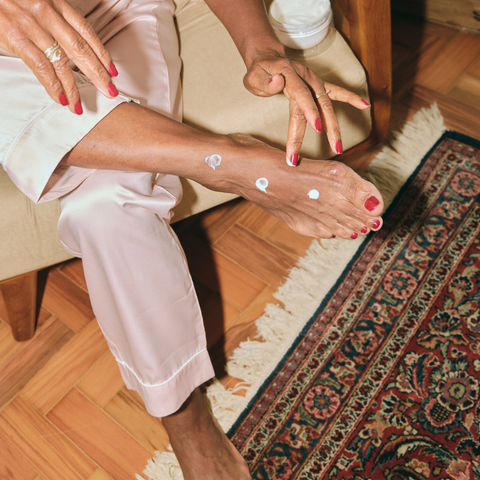
Step 8: Finally, choose between the HYDRATE or NOURISH option. HYDRATE is a thick foot balm made from all-natural ingredients. Apply it generously to your feet, focusing on areas that need extra moisture and nourishment. If you prefer a lighter option, use NOURISH, an all-natural lotion, instead.
And that's it! You've completed the steps using the pedicure nail kit by a Modern Podiatrist. Enjoy your refreshed and rejuvenated feet!
Comments (0)
There are no comments for this article. Be the first one to leave a message!